Connect IQ Setup
ArguStress provides its own Connect IQ data fields and applications to display real-time data from your mnsX device.
This guide focuses on data field installation and configuration.
If you are interested in interface overviews or compatible devices, please visit one of the guides below.
1. Download Data Field
ArguStress offers two Connect IQ data fields:
You can install them using either method:
- On your phone via the Garmin Connect IQ Store app
- On a PC or laptop via Garmin Express
In both cases, simply search for ArguStress in the Connect IQ Store.

2. Install Data Field on Watch
Edge users: Skip to 3. Insert the Data Field on Edge.
For Connect IQ Experienced Users
We recommend using the ArguStress Watch Data Field with a 1-Field layout.
You can skip to 4. Data Field Settings.
For New Users
Please, follow the steps below.
Please note that Garmin menus may vary slightly between devices. If something looks different or doesn’t work, feel free to contact us — we’re happy to help.
Note: When we say Select, it means choosing an option and pressing the Enter / Start button (top-right button).
Step-by-Step Instructions
In this example, we use the Run activity.
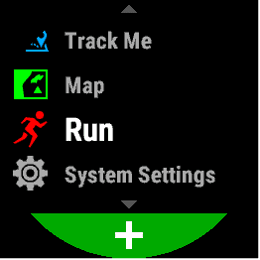
- 1. Select the activity you would like to use (e.g. Run).
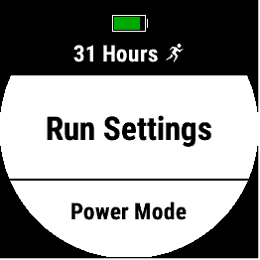
- 2. Long-press the UP button (middle button on the left side) to open the activity settings.
- 3. Select Run Settings.
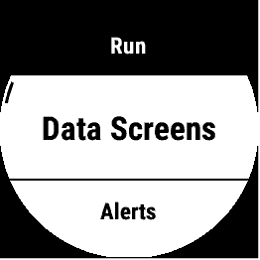
- 4. Select Data Screens.
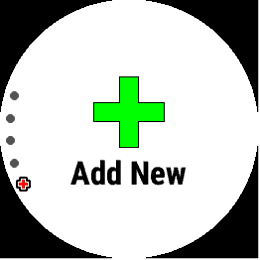
- 5. Scroll down (or press UP once) and select Add New.
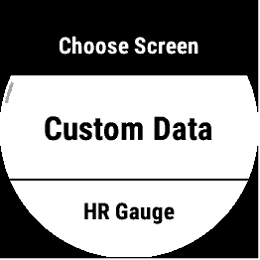
- 6. Select Custom Data.
- 7. Select a 1-Field layout.
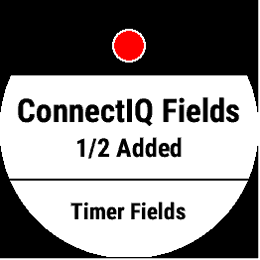
- 8. Select Connect IQ Fields.
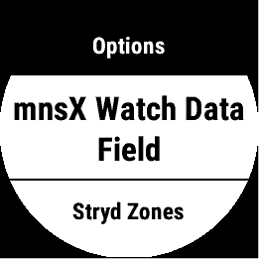
- 9. Select mnsX Watch Data Field.
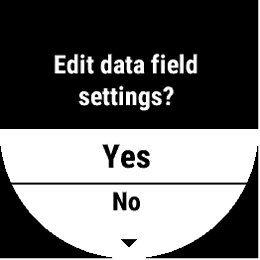
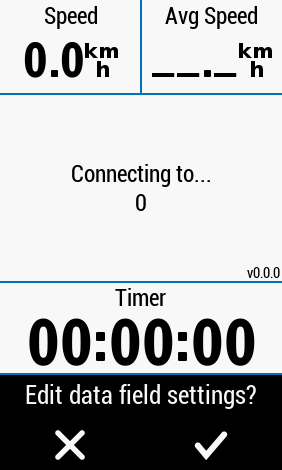
- 10. When prompted “Edit data field settings?”, select Yes.
- If you don’t see this prompt or you miss clicked and disapperared, then don’t worry! You can edit the settings manually later (see 4. Data Field Settings).
- 11. Configure the settings as described in 4. Data Field Settings.
- 12. Press the BACK button (bottom right button of the watch) to save the settings.
- 13. Select where to place the new data screen.
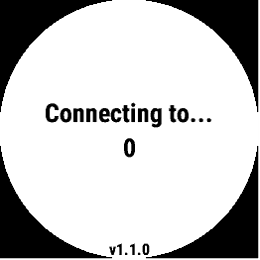
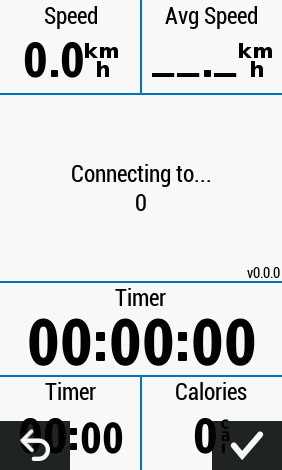
- Important: You may initially see “Connecting to … 0%”. This is completely normal.
- Press the BACK button (bottom right button of the watch) a few times to return to the main screen.
- Reopen the activity.
From now on, you should see:“Connecting to … your mnsX ID”.

3. Install Data Field on Edge
For Connect IQ Experienced Users
We recommend using the ArguStress Bike Data Field:
- Older Edge devices: B-type layout.
- Newer Edge devices: 1-column, large-field layout.
You can skip to 4. Data Field Settings.
For New Users
Please, follow the steps below.
Please note that Garmin menus vary slightly across Edge devices. This guide is based on the Edge 1030 Plus, which has a more complex interface. Newer devices (such as the Edge 1050) are simpler, and if you follow along, it’ll work just fine on those too. If something doesn’t work, feel free to contact us - we’re happy to help!
Note: When we say Select, it means tapping the item on the screen or pressing the Enter button (top-right button).
Step-by-Step Instructions
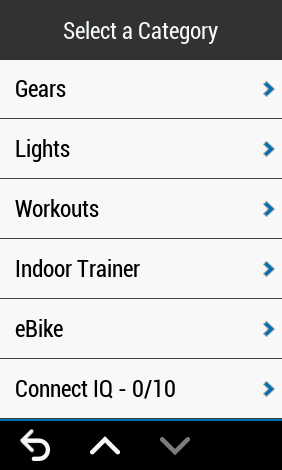
- 1. Open the device menu and go to Activity Profiles.
- 2. Select the activity you would like to use (e.g. Road).
- 3. Select Data Screens.
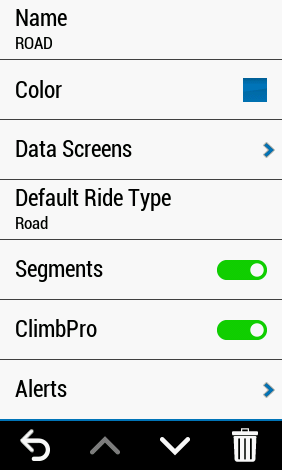
- 4. Select the Screen where you would like to add the new data field.
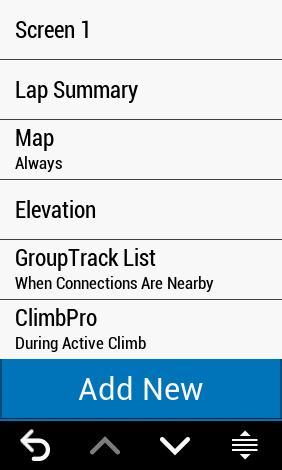
- 5. Select Layout and Data Fields.
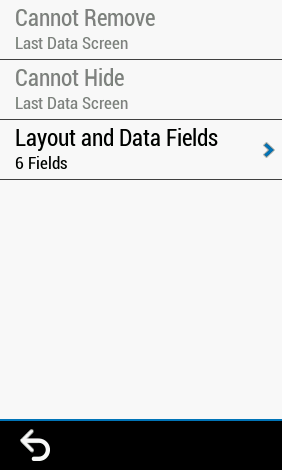
- 6. Choose a B-type layout.
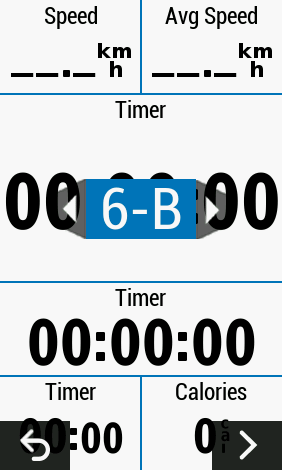
- 7. Double Tap (select) on the “tallest” field.
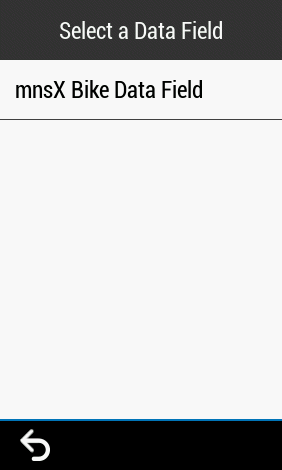
- 8. Select Connect IQ (it should be the last option).
- 9. Select the mnsX Bike Data Field, and be careful with the next step.
- 10. After selecting the field, your device should ask: “Edit data field settings?” → Select Yes.
- If you don’t see this prompt or you miss clicked and disapperared, then don’t worry! You can edit the settings manually later (see 4. Data Field Settings).
- 11. Configure the settings as described in 4. Data Field Settings.
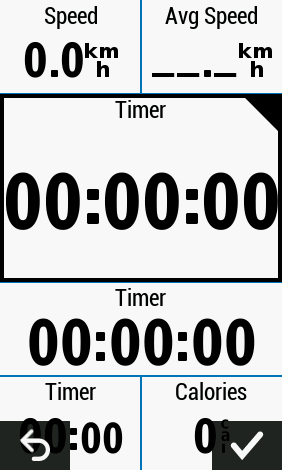
- 12. Press Back to save the settings.
- 13. Tap the Accept button (check mark).
- Important: You may initially see “Connecting to … 0%”. This is completely normal.
- Press the BACK button (bottom right button of the watch) a few times to return to the main screen.
- Reopen the activity.
From now on, you should see:“Connecting to … your mnsX ID”.
4. Data Field Settings
You can customize the ArguStress Connect IQ data fields in several ways.
How to Access the Settings
You can open the data field settings using any of the methods below.
During Setup
- After inserting the ArguStress Connect IQ data field, Garmin will prompt: “Edit data field settings?” → Select Yes
From the Connect IQ Store App
- Open the Connect IQ Store app.
- Tap the device icon (bottom-right corner).
- Tap My Data Fields.
- Select ArguStress Data Field.
- Tap the Settings button.
- Open Garmin Express.
- Select your device.
- Go to Apps.
- Click the three dots next to ArguStress Data Field.
- Select Settings.
On Newer Garmin Devices
Some models allow you to edit data field settings directly from the activity. The menu structure varies by device. If you’re unsure where to find it, feel free to contact us - we’re happy to help.
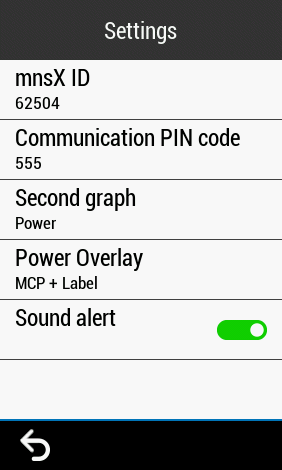
Settings Overview
Choose what is displayed below the main graph:
- Power (recommended)
- Heart Rate (deprecated)
- Speed (deprecated)
Select the reference curve shown on the Power graph:
- FTP + Label – Shows the FTP line with its value
- FTP – Shows only the FTP line
- mCP + Label (highly recommended) – Shows the mCP curve with the current mCP value
- mCP – Shows only the mCP line